|
FACTORY INSTALLED THERMOMETERS
We would be remiss in not commenting on many of the factory installed thermometers offered on barbecue pits. First of all, if you have a thermometer on your pit that says WARM, MEDIUM, HOT, then you are literally "shooting in the dark" on the actual temperature. They are simply inaccurate at best. You have as good (if not better) chance of determining the temperature by placing your hand on the side of the pit as looking at that type of gauge.
Second, one person's pit may read medium which may be another person's HOT or even WARM.
Third, manufacturers using this type of thermometer are offering the least expensive measuring device (not a thermometer!) to make their pits more affordable.
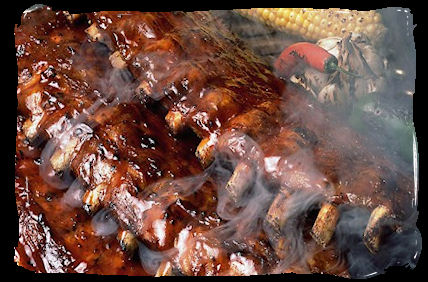
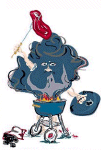
If you want to control heat, you have to know the temperature at which you are cooking. It is impossible to even begin to estimate the time it will take to cook the meat without a thermometer. You should GO AND GET A REAL BIMETAL THERMOMETER!
OK, let's now look at the ideal placement of the bimetal thermometer on your pit. We all know that heat rises. Cooler air sinks. This is true in your home and in your barbecue pit. Using a typical pit which is approximately 2 feet in diameter (or, if it is rectangle, 2 feet from top to bottom) it is not uncommon to have anywhere from 40 to 70 degrees difference from the surface of the cooking grate to the top of the cooking chamber. Many manufacturers place their thermometers in the lid or on top of the cooking chamber.
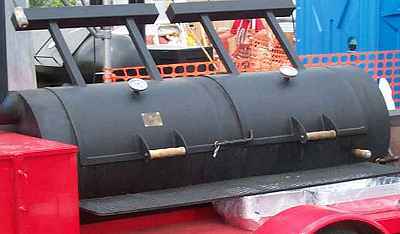
Examples of incorrect locations of chamber thermometers
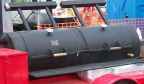 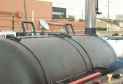
Nope, that's not the correct place to measure the cooking temperature. Place your thermometer at or very near the location where the meat is being cooked. If placed too high, you will be measuring a much higher temperature and actually be cooking the meat up to 50 degrees cooler!
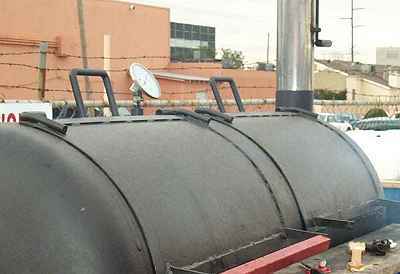
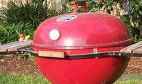
Examples of correct locations of a chamber thermometer
TESTING YOUR THERMOMETER
If you already have a bimetal chamber thermometer (or you have just bought a new one), we recommend testing it once a year. These guys are exposed to extreme temperatures and weather and sometimes will corrode or become inaccurate. An inaccurate thermometer is worthless. [EXAMPLE: I borrowed my brother's trailer rig for a large party and he had two thermometers - ONE was simply broken and if you tapped it, the needle would swing this way and that. The OTHER was reading 60 degree high!]
To test your thermometer, simply remove the thermometer from the barbecue pit and carefully place the stem of the thermometer into boiling water. It should read at, or very near, 212 degrees. Assuming this is working properly, next place the stem in a glass of water with ice cubes. Use the stem to stir the water and ice. It should read 33 or 34 degrees. Using a glass of alcohol and ice will make it closer to 32 degrees.
Your ONLY bet in controlling the cooking process on the outdoor barbecue pit is to know your temperatures!
Meat Thermometers
Last month, we discussed the differences between thermometers, thermostats, thermo scopes. We reviewed the proper way to mount and use a good quality thermometer. We then ventured into some of the more common-proper temperature ranges for cooking. Finally, we discussed the limitations of factory installed thermometers and the reasons for testing and using a quality thermometer to achieve desired results.
PROBLEMS:
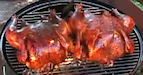
Ok, now we are all on the same page once again. Let's start with my experience this father's day weekend. I was invited to a friend's event out in the country. The host had been cooking all day and we tasted venison, wild hog, sausage and chicken. The hog and venison proved to be tough (still very tasty, however). They were overcooked in only about 6 hours, sausage dried out in about 3 hours while the chicken did not get done and had to be placed in the oven. Not an uncommon event experienced around the world on any given weekend!
What's wrong with this picture? Temperatures and Time!!! First, let's take a look at what probably happened.
Let's begin with the hog. He was not all that big. You will not have anything tender, tasty and moist if over 5 pounds and under 8 hours. Wild game is usually very lean meat and as such does not have the fat associated with the domestic hog. Cooking time for this animal should have been around 10 to 15 hours at temperatures not to exceed 210 to 220 degrees. Frequent basting and careful use of heat to make the meat tender. I suspect that in the need to "GET IT DONE", temperatures exceeded 250 to 275 degrees or more. You just can't get a hog done in 6 hours otherwise. The sausage needed no more than 1 hour in 210 degree heat to cook and still be moist. Finally, the chicken was still being defrosted in the microwave about 2 hours before being placed on the table. Needless to say, when we sat down to eat, the chicken did not make the cut!
Suspected Mistakes: There was not a meat thermometer within 10 miles. The temperature was not monitored. The meat was not basted. Timing for putting the meat on the pit vs. when it needed to be done was off schedule.
For example, as we said, the hog should have been placed on the pit at 220 degrees for some 10 to 15 hours with regular basting every 30 minutes. Sausage, no more than an hour. For the chicken, it should have been defrosted much earlier, cleaned and trimmed of excess fat, seasoned, covered and in the refrigerator some 2 hours BEFORE being placed on the pit. Again, know your times, monitor your temperatures and make it tender, moist and done.
OK, how do we make the meat done (not overdone) and on time?
All of these foods need to be cooked in indirect heat. For more information on this method of cooking, please take a moment and read Smoky's article on "HEAT" @ http://barbecuen.com/heat.htm
This will give you a great foundation for learning about this cooking process.
For more on proper temperatures, please visit: Proper Temperatures
Continued on Page 3 - Meat Thermometers Discussion
Back to Page 1 - Thermometers
|