We combine charcoal and wood grills together because when done properly, they create the same intensity of flavor and effect. Charcoal is basically ready to light and go. Wood, on the other hand, needs to be burned and reduced to coals BEFORE it is used for cooking food. The reason why wood needs to be burned down first is due to the fact that there are certain resins and impurities that taint the food and cause it to become bitter and less than desirable. Otherwise, charcoal and wood function in the same manner. For the purpose of this section, we will refer to both as charcoal.
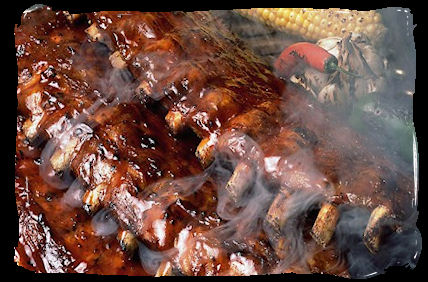
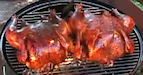
A charcoal grill uses charcoal or wood as it's primary means of delivering heat. Additionally, the meat resides directly over the fire. [pictures]
Cleaning the grill
And there are many to choose from. For the most part, it makes little difference which one you choose. Remember, you are just beginning don't need anything real fancy. So, don't go out and blow a bundle. Start with something simple. Some choices would include a: Kettle Grill, Box Grill, Barrel Grill, Drum Grill, etc. Most of these grills can be had for $29.00 to $100.00 - a small price to pay for excellent entertainment.
Make sure the grill chosen has sturdy legs! Meat seasoned with dirt will not make a hit with your friends! Also make sure that it has an adjustable cooking surface. When the fire is too hot or cool, you will be able to raise or lower the meat accordingly.
Insure the grill has an easy means of adding more charcoal if and when necessary. Some grills require removing the meat in order to add additional charcoal. The grill should also have a lid with holes in the lid for ventilation. Closing the vents in the lid is only extinguish a "run-away fire".
The body of the grill [where the charcoal resides] should also have adjustable holes in either the bottom or in the sides to allow controlling the amount of fresh air into the chamber [when the lid is closed] so that the fire can continue to burn adequately.
There are basically several to choose from. Two to be exact - briquettes and non-briquettes or rough charcoal. To know more than you want to know about charcoal, you may visit our Charcoal Page. But basically, the charcoal briquettes are more dense and will burn more evenly and longer. They may not have all the flavor of the rough charcoal. Rough charcoal, on the other hand, will burn hotter and shorter. It just depends upon what type of cooking you may want to do. We'll give some examples of what type of charcoal to use later.
FIRST, NEVER EVER USE GASOLINE TO START ANY TYPE OF FIRE!
The old boy scout twig method is great for camping, but slows the process way down for grillers! First, there is the tried and true lighter fluid method, a petroleum based produce. Lay the charcoal out in a flat method in order that all the charcoal is coated with lighter fluid. Then stack the charcoal into a pyramid fashion and coat once or twice more. Allow about one minuet to put the remainder of the lighter fluid away. Then light the bottom of the stack and watch it take off. Allow about 30 to 45 minutes for the petroleum vapors from the fluid to burn off. By then the charcoal should have a light coating of gray ash on it. If so, you are then ready to begin.
Second, a charcoal chimney will initially start the fire slower, but you don't have to wait for the fluid to burn off. Place paper in the bottom of the chimney and fill with charcoal. Light the paper and about 15 minutes it should be ready to go. Pour the red hot glowing charcoal into the grill body and get ready to go to work! A large coffee can serve the same purpose, but it has no handles and care must be taken to avoid burns.
AGAIN, NEVER EVER USE GASOLINE TO START A FIRE OF ANY KIND!
Now that we have our grill selected and lit, we are ready to begin the process of outdoor cooking. Get ready to fend off the neighbors when the food begins sizzling and smelling up the neighborhood!
Plan your meals - decide at least several hours ahead of time what the menu will consist of. Meat, veggies, appetizers and dessert. Do the shopping early and have each item planned and set out for easy access. Season the meat and allow it to sit for at least an hour before cooking begins. Beverages are an important part of any cookout . . . so make sure the favorites are within reach at all times. And remember the famous quote of C. Clark "Smoky" Hale, notable baster and "Barbecue Hall of Famer: "Don't be nervous or up-tight . . . it makes the meat tough!" . . . . . Thanks, Smoky.

"What" is to be cooked is not nearly as important as is "how" it is cooked. A juicy hamburger is better any day than a char-dead steak! So, our objective, as well as our intent, is to teach each person to cook anything and everything. We will let you determine which recipes seem appealing and we'll show you how to cook it!
The required temperature of the grill will vary depending upon the selection of food. Use the "Hand" method discussed above in Lesson Number 3 - if a thermometer is not available. For example, fish will need a medium fire -350 to 400 degrees while a steak will need a hot fire 700+ degrees. Here are some rough ideas for your use:
Fish
Use a medium fire. Fish should be close to room temperature before cooking. Coat the fish with a light coating of oil and turn often. Remember, fish cooks easily and quickly. To determine when fish is done, use a fork and attempt to break it apart in the thickest portion. It should flake easily. If not, then cook on . . . .
Chicken
Use a medium/hot fire. Chicken should be close to room temperature before cooking. Place the seasoned chicken on the grill and allow to brown on the first side and then the other. If the fire is hot enough, the chicken will seize the cooking grate at first and then release when it is ready to turn. Chicken will be done once it reaches 165 degrees F. Use the bi-therm instant thermometer to verify it is done. For more information on cooking chicken breasts, please see Smoky's "Valentine Breasts".
Pork Chops
Use a medium/hot fire. Pork and Lamb Chops should be close to room temperature or a little cooler before cooking. Cook similar to chicken. Pork is done when the internal temperature reaches 145 degrees. There may be some pinkness, but all undesirable are killed at 137 degrees F. Do not cook over 155 degrees F. as you will then guarantee a dry, tough piece of meat.
Steaks
Use a hot fire! The temperature of a steak before cooking may vary somewhat. Our preference is to select a smaller diameter yet thicker (3/4 inch) piece of meat. This allows for proper charring of the outside of the meat, but still retain a juicy interior. These are the type of steaks seen in favorite steak houses. If for some reason a thinner steak is being used (1/2 inch), cool the steak down to where it is firm, but not frozen solid. This will provide for charring on the outside while the inside is spending most of the time just thawing. The result will be a charred outside and juicy inside! For more information on cooking the perfect steak, please see Smoky's "A Steak on Every Grill".
Always use the bi-therm instant read thermometer to determine when the meat has reached the desired duneness For more information on grilling temperatures, please consult Barbecue'n's Cooking Temperature Pages.

Always allow the coals to die down to the point of touch and then move them to a safety container - an empty steel container works nicely. When the ashes are cold, they may be trashed or placed in the garden. If coals are allowed to remain in the grill, their corrosive nature will eat away at the grill and destroy it much earlier than otherwise.
As for the grates, again let the grill cool. There are two ways to do this. . . . First, simply take a steel wire brush and vigorously brush/scrape all of the cooked on food off the surface. Then use a paper towel to remove any loose material. Secondly, before you begin to cook the next time, heat the grill to high temperature to cook the food off. You can then simply brush the food off easily.
We hope the forgoing sets each person on the correct path to creating great outdoor events. Don't forget to enjoy the process, have fun and if things don't turnout just right, consider it a learning experience and keep on trying. Getting there is most of the fun!
Enjoy!
So much for charcoal grilli'n . . . . . . . WANT MORE? . . . . . let's look at gas grilli'n and barbecu'n! . . . . . .
Gas Grilling
Barbecuing
Basic Outdoor Cooking Lessons - Go here first!
Back to the Beginner's Page